Blog Archive

Showing posts with label Spectrum Noir. Show all posts

Hopeless romantic!

I saw a post on our American Crafter's Companion blog that was just too good to not share with you you guys. It's a sweet card by Carmi using the Humphrey's Corner stamps and Spectrum Noir pens. I'll let Carmi explain in her own words how she created this adorable project...


In the Humphrey unmounted rubber stamp collection is this sweet girlie elephant.

She is very shy.

I stamped her using my Rock-a-blocks and black ink.


The image on the package inspired me to colour her in this palette. Happily, I was able to use the new Crafter's Companion Spectrum Noir markers. They are fabulous to work with!


I cut my coloured image into a smaller square and added some foam tape to the back to give it some height on the card.


I placed the bouquet behind her arms by using an x-acto knife to cut a little insert.


Isn't she sweet?


She is originally from the "Birthday Girl" set.

You can see how she can be used for all occasions!


What do you think guys? Do you agree that she was just too cute to stay purely on the American blog?

Colour Blends

As you're all probably aware by now, the Spectrum Noir colour packs are packaged to contain three cool and three warm shades. Now if you're not quite sure about which ones should be grouped together and would like a little help then we have created a handy little chart for you to refer to. This chart shows swatches of all the colours and they have been grouped together and labelled so you can see, at a glance, which ones work best with which. Remember that we have lots of downloads available on the Crafter's Companion website, including bonus papers, tutorials and reference guides. Take a look to see what there is available for you. In the meantime though simply click on the image below to download the Spectrum Noir colour blends sheet.


Hair colouring

One of the largest amount of requests we've had since launching the Spectrum Noir pens is colouring guides and help for colouring in hair, in particular how to get the dimensional effect as if light is reflecting off it. Over the past few days I have shared with you a few tutorials and I wanted to continue this with DT member Jacqui's piece she posted on her blog about what colours to use together to achieve different hair colours. She has done little charts and coloured in examples of light, mid and dark hair tones, and I really hope that you find it useful!


Here's all three examples...


And here's a zoomed in shot of the dark haired sample...


And then the mid-toned sample...


And finally the light-toned sample...


Thanks for taking the time out to do this for us Jacqui!

Video tutorial

Sometimes it's so much easier watching someone demonstrate how to do a certain technique rather than following step-by-step instructions which is why we have created a selection of video tutorials for you. There is one in particular that I want to show you today, and that is how to colour in an entire stamped image using the new Spectrum Noir pens. Leann guides you, in great detail, how to achieve perfect results every time. The stamp she has used is called 'After the Rain' from the super-cute s.w.a.l.k range that is available from the Crafter's Companion site. Sit back & enjoy!


Colouring tutorial

We've been inundated with requests for colouring techniques tutorials to go alongside the new Spectrum Noir pens and, in true form, our amazing DT have risen to the occasion with an array of tutorials to help you get the most from your pens. I will share a selection with you over the coming days but if you can't wait & want to get started with your colouring straight away then head over to the 'I'm a Crafter's Companion' group on Facebook where they've been busy little bees uploading their work.

Today though, I'm going to show you Linda's tutorial for how to colour in Beatrix Potter stamped images with the Spectrum Noir pens.

Linda started with a sheet containing a stamped image & swatches here...


and ended up with a finished image here...


To find out all the steps in between head over to her blog & find out how you too can colour like Linda!

A few of my favourite things

Forget raindrops on roses and whiskers on kittens, a few of my favourite things right now are Spectrum Noir pens and the new s.w.a.l.k stamps, so imagine my delight when I saw this little beauty...


...on the Crafter's Companion gallery. I love, love, love this image - there's something very 20's/30's about the bride's veil although it's also a very modern image...does that make sense? If you're ever stuck for inspiration remember to pop across to the gallery, that has been split into different sections to make it easy to navigate, and be prepared to be amazed by the sheer vast of talent that's on there. We really are lucky to have such an amazing DT to provide us with all these cards so thank you to you all for continuing to inspire me :)

Colouring hair tutorial

How are you getting on with your Spectrum Noir pens guys & gals? If you haven't heard of the new Spectrum Noirs by Crafter's Companion then where have you been?!! They are the fabaroo new alcohol pens that are taking the craft market by storm! Don't just take our word for it though, this is what Marie Bridgeman has to say about the pens...

I just wanted to say a huge thank you for bringing us the Spectrum Noirs!! I've never been any good at blending with promarkers so had resigned myself to just colouring within the lines LOL! But because of the reasonable price of the SNs, I thought I'd give them a try and from the first go, have been thrilled with the results!! Here's the first card I've made with them. And if you ever need an advocate for these pens, I'm your woman!!!!!!!

And here's the card that Marie made...
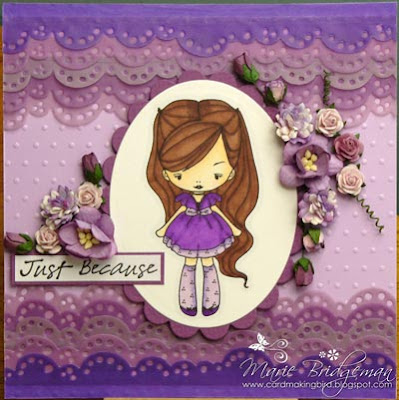

If you want to see more of what Marie has created then please visit her blog.


I've also got a great tutorial for you today on using the pens to colour hair on stamped images by DT member Linda Hill. If you want to know how you get from this...
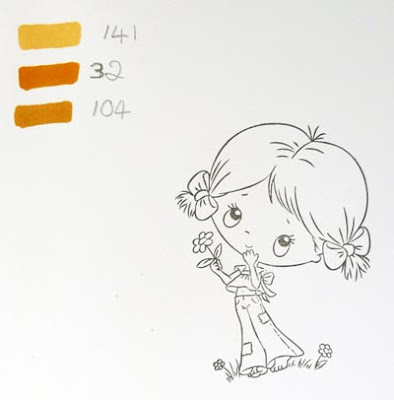


to this...
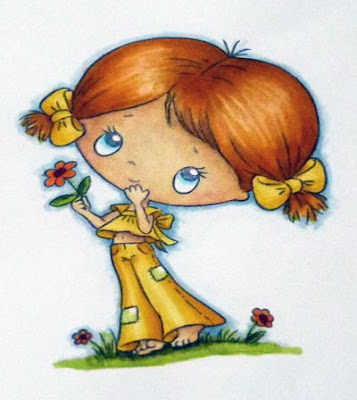


then you need to hop across to Linda's blog where she gives you full photographic step-by-step instructions. She explains really clearly how you go from the lightest shade down to the darkest shade and then how you go over the top of it all with the lightest pen again to blend it all in nicely. It's a handy little tutorial that will really help you along to achieve professional looking results.

Let us know how you get on with them!